-
Koa2中文文档
- 1.koa2快速开始
- 2. Koa2 路由 以及中间件
- 3. 请求数据获取
- 4. 静态资源加载
- 5. Koa2中 cookie/session
- 6. Koa2 模板引擎
- 7. 图片文件上传
- 8. Koa操作MongoDB以及mysql数据库
- 9. JSONP实现
- 10. koa其他模块
-

Nodejs+Koa2—+微服务实战、Serverless入门实战
Nodejs基础、Nodejs打在一个类似Express的框架、MongoDb的基础、Nodejs操作Mongodb、Koa2入门实战。从0到1学会Nodejs入门教程
-

Serverless+Egg.js+Vue3.x无人点餐全栈项目
-

Flutter教程_Dart Flutter入门实战系列视频教程
-

Nestjs仿小米商城企业级Nodejs项目实战视频教程
-

Eggjs仿小米商城企业级Nodejs项目实战视频教程
Koa2中集成GraphQl实现 Server API 接口
Koajs入门视频教程在线学习地址:https://www.bilibili.com/video/BV1xm4y1c7zr/?p=1
Koajs入门视频教程网盘下载地址:https://pan.baidu.com/s/1QN_XkXRXmIw6V7HevntBQQ 提取码:abcd
GraphQL是一种新的API 的查询语言,它提供了一种更高效、强大和灵活API 查询。它弥补了RESTful API(字段冗余,扩展性差、无法聚合api、无法定义数据类型、网络请求次数多)等不足。
GraphQL的优点:
1、吸收了RESTful API的特性。
2、所见即所得
各种不同的前端框架和平台可以指定自己需要的字段。查询的返回结果就是输入的查询结构的精确映射
3、客户端可以自定义Api聚合。
如果设计的数据结构是从属的,直接就能在查询语句中指定;即使数据结构是独立的,也可以在查询语句中指定上下文,只需要一次网络请求,就能获得资源和子资源的数据。
4、代码即是文档
GraphQL会把schema定义和相关的注释生成可视化的文档,从而使得代码的变更,直接就反映到最新的文档上,避免RESTful中手工维护可能会造成代码、文档不一致的问题。
5、参数类型强校验
RESTful方案本身没有对参数的类型做规定,往往都需要自行实现参数的校验机制,以确保安全。
但GraphQL提供了强类型的schema机制,从而天然确保了参数类型的合法性。
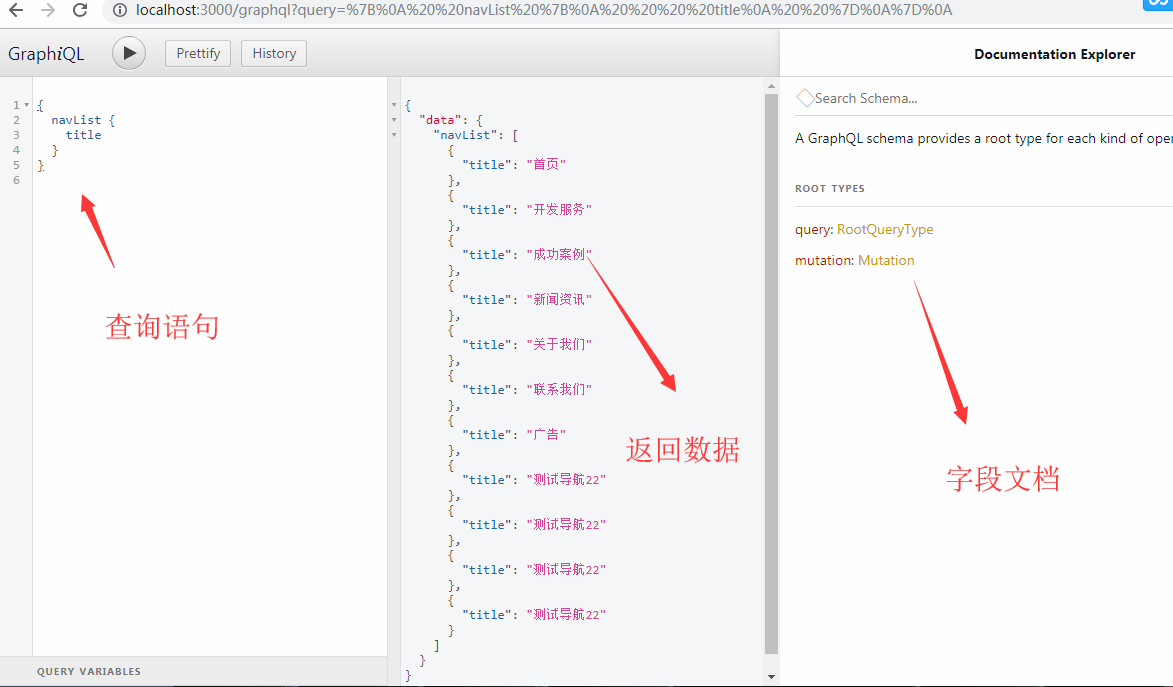
下面我们看看Koa2中集成GraphQl实现 Server API 接口:
1、找到koa-graphql官方文档
https://github.com/chentsulin/koa-graphql
2、安装koa-graphql graphql koa-mount
npm install graphql koa-graphql koa-mount --save
3、引入koa-graphql配置中间件
const Koa = require('koa');
const mount = require('koa-mount');
const graphqlHTTP = require('koa-graphql');
const GraphQLSchema=require('./schema/default.js');
const app = new Koa();
app.use(mount('/graphql', graphqlHTTP({
  schema: GraphQLSchema,
  graphiql: true
})));
app.listen(4000)
4、定义GraphQLSchema
1、新建schema/default.js
2、定义Schema
const DB=require('../model/db.js');
      const {
          GraphQLObjectType,
          GraphQLString,
          GraphQLInt,
          GraphQLSchema,
          GraphQLList
        } = require('graphql');


      //定义导航Schema类型
      var GraphQLNav=new GraphQLObjectType({
          name:'nav',
          fields:{
              title:{ type: GraphQLString },
              url:{ type: GraphQLString },
              sort:{ type: GraphQLInt },
              status:{type:GraphQLInt},
              add_time:{ type: GraphQLString }
          }
      })


      //定义根
      var Root = new GraphQLObjectType({
        name: "RootQueryType",
        fields: {
          navList: {
            type: GraphQLList(GraphQLNav),
            async resolve(parent, args) {
              var navList=await DB.find('nav',{});
              console.log(navList)
              return navList;
            }
          }
        }
      })

 //增加数据


const MutationRoot = new GraphQLObjectType({
  name: "Mutation",
  fields: {
    addNav: {
      type: GraphQLNav,
      args: {
title: { type: new GraphQLNonNull(GraphQLString) },
description:{ type: new GraphQLNonNull(GraphQLString) },
keywords:{ type: GraphQLString },
pid:{ type: GraphQLString},
add_time:{ type: GraphQLString},
status:{ type: GraphQLID}
      },
      async resolve(parent, args) {
var cateList=await DB.insert('nav',{title:args.title,description:args.description,keywords:args.keywords,pid:0,add_time:'',status:1});
console.log(cateList.ops[0]);
return cateList.ops[0];
      }
    }
  }
})


module.exports = new GraphQLSchema({
    query: QueryRoot,
    mutation:MutationRoot
});
5、使用
GraphQl增加数据
mutation{
addNav(title:"测试导航",description:"描述"){
title
}
}
GraphQl查询数据
{
articleList{
title,
cateList{
title,
description
}
}
}